About the author:
John Hepfinger is global market manager for Milliken Infrastructure Solutions. Hepfinger can be reached at [email protected].
A geosynthetic cementitious composite mat (GCCM) is a rehabilitation solution consisting of a geosynthetic material impregnated with cement that hardens when hydrated to form a durable concrete layer that delivers a protective erosion control and armoring surface. The material has a low alkaline reserve, wash rate and installation footprint for a minimal ecological impact. It comes on an easy-to-use roll and can be used as a solution for a variety of maintenance issues, including culvert rehabilitation for inverts as well as at the headwall, inlet and outfall.
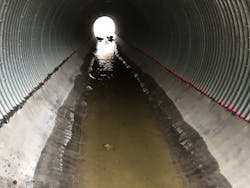
GCCM functions as a new wear surface for culvert inverts and as an erosion control measure for the culvert’s surroundings. Over time, the invert of a culvert degrades from both corrosion and abrasion because of constant exposure to water and soil particle transport. GCCM can be installed by an internal team to line the bottom of the culvert and extend the life of the structure, which makes it easier to prioritize annual spending until a full replacement is eventually needed.
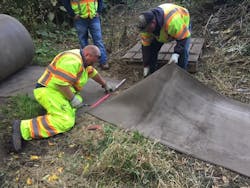
Below are step-by-step instructions for installing GCCM in a culvert. The proper personal protective equipment should be worn at all times, and you may need forced air in poorly ventilated areas. For the installation itself, grout or concrete, a box cutter or razor knife, stainless steel screws, sealant, and a hydration method (water source) will be needed.
1. Properly inspect the culvert for prior damage.
2. Clear the project location of any debris that would create voids, ridges or bumps beneath the material.
3. Clean and repair any penetration by filling voids with grout or concrete.
4. Confirm the dimensions of what is to be covered.
5. Determine if the GCCM needs to be installed longitudinally or transversely across the culvert’s center line.
6. Use longitudinally if the area can easily be covered by a roll width.
7. Use transversely on large-diameter culverts no less than 36 in.
8. Install the material with the plastic backing (water-resistant) side of the material against the pipe.
9. Install in a shingled pattern to reduce any water seepage between overlapping sections.
10. Make cuts to the material using a box cutter or razor knife and appropriate hand personal protective equipment.
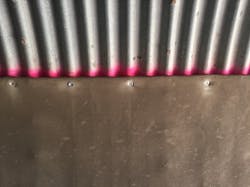
11. Attach the GCCM to the side and along the bottom of the culvert at every joint with stainless steel screws spaced 6 to 12 in. apart.
12. Hydrate the GCCM with the existing water in the culvert by brooming or spray in water from a different source.
13. Take multiple passes of a moderate spray of water from virtually any water source (dirty or salt water will not affect the product’s performance).
14. Press your thumb into multiple areas of the material to be sure that it has been hydrated sufficiently. This is called the “thumb test.”
15. Wait 30 to 60 minutes and douse the material again to ensure hydration.
16. Go back the next day and fill the space between the hardened material and culvert pipe with sealant.
17. The culvert may require additional treatment at its inlet and outlet to further prevent undermining.


